目录索引
译文
有两种往项目中添加 Shader Graph 的方式:
- 在创建项目时选择 URP 或 HDRP 模板
- 在 Unity 包管理器(路径:Window / Package Manager)中安装 Shader Graph 包
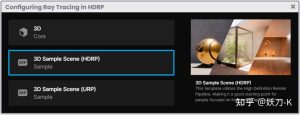
如果我们用 URP 或 HDRP 模板创建项目,项目中就自带了 Shader Graph 的包,这意味着在创建着色器时(Assets / Create / Shaders)可以找到一个名为 Shader Graph 的选项。
![图片[1]-《Unity着色器圣经》9.0.2 | 准备Shader Graph环境-软件开发学习笔记](https://gamedevfan.cn/wp-content/uploads/2025/05/image-107-1024x398.jpeg)
如果我们在内置渲染管线中创建了一个项目,但之后想将其升级到 URP 或 HDRP 该怎么办?
我们可以把基于内置渲染管线的项目升级到 URP,需要在包管理器中下载 Universal RP 的包(包含了对 URP 的支持),还需要在包管理器中安装 Shader Graph 包。
但是我们没有办法将基于内置渲染管线或 URP 的项目升级到 HDRP,HDRP 是用于高端视频游戏的渲染管线,只能从 Unity Hub 中新建。
安装好这两个包后,我们需要从 Assets/Create/Rendering(资产/创建/渲染)菜单中创建“管线资产”(Pipeline Asset)文件和“前向渲染器数据”(Forward Renderer Data)文件。
一般来说,当我们新建管线资产时,Unity 会默认创建一个前向渲染器数据文件,该文件可用作 URP 的渲染路径。
有了这两个文件后,现在我们需要进入项目设置(Project Setting)窗口,在图形(Graphics)选项中将管线资产文件分配到可编程渲染管线资产(Scriptable Render Pipeline Asset)框中,这样 Unity 就会知道现在的渲染管线与 URP 配置相对应。
最后,我们必须进入项目设置中的质量(Quality)部分,在渲染(Rendering)框中再次指定管线资产,这样就可以通过同一个渲染管线资产修改与渲染相关的所有属性。
在 URP 或 HDRP 中创建着色器的过程与内置渲染管线完全相同,唯一的区别在于 Shader Graph 类着色器属于专有类别,在安装包时会自动添加。
![图片[2]-《Unity着色器圣经》9.0.2 | 准备Shader Graph环境-软件开发学习笔记](https://gamedevfan.cn/wp-content/uploads/2025/05/image-106-1024x362.jpeg)
请注意,上述过程和步骤可能会根据 Unity 版本的不同而有所变化。
原文对照
There are two ways to include Shader Graph in our project:
- From the default settings, when we create a project, either in Universal RP or High Definition RP.
- Installing from the Unity Package manager, which is located in the path: Window / Package Manager.
If we start a project in Universal RP or High Definition RP, this package is included by default, and we can use it immediately. This means that in the menu: Assets / Create / Shaders, we can find a new section of shaders that work exclusively for these types of rendering.
![图片[1]-《Unity着色器圣经》9.0.2 | 准备Shader Graph环境-软件开发学习笔记](https://gamedevfan.cn/wp-content/uploads/2025/05/image-107-1024x398.jpeg)
What if we have created a project in Built-in RP and want to upgrade it to either Universal RP or High Definition RP?
From Built-in RP, we can upgrade to Universal RP. To do this, we must follow the second step that was described in the inclusion of Shader Graph in the project. Likewise, it will be necessary to include the Universal RP package, which adds support to this type of rendering pipeline.
It should be noted that you cannot upgrade a project from Built-in RP or Universal RP to High Definition RP. High Definition RP is a rendering pipeline for high-end video games and can only be started as a project from the Unity Hub.
Once we have installed both packages, we will have to create a type of object called Pipeline Asset and another called Forward Renderer Data from the menu: Assets / Create / Rendering.
Generally, when we create a Pipeline Asset, Unity creates a Forward Renderer Data file by default, which works as Render Path for Universal RP.
Having these files, we must go to the Project Settings window and in the “Graphics” option assign the Pipeline Asset object in the Scriptable Render Pipeline Asset box, this way Unity will know that the render pipeline now corresponds to the Universal RP configuration.
To finish, we must go to Quality, which is inside the Project Setting and assign the Pipeline Asset again in the Rendering box, in this way all the properties associated with the rendering can be modified from the same Render Pipeline Asset.
The process of creating a shader in Universal RP or High Definition RP is exactly the same as in Built-in RP, the only difference is that Shader Graph shaders are in an exclusive category that is added automatically when installing the package.
![图片[2]-《Unity着色器圣经》9.0.2 | 准备Shader Graph环境-软件开发学习笔记](https://gamedevfan.cn/wp-content/uploads/2025/05/image-106-1024x362.jpeg)
Please consider that the process and steps mentioned above may change depending on the version of Unity, however, its creation and installation analogy is the same.

![[udemy]在 Unity 中创建 RPG 游戏的终极指南-软件开发学习笔记](https://gamedevfan.cn/wp-content/uploads/2025/04/TheUltimateGuidetoCreatinganRPGGameinUnity.webp)
![[udemy]学习在 Unity 和 C# 中创建吸血鬼幸存者风格的游戏-软件开发学习笔记](https://gamedevfan.cn/wp-content/uploads/2025/04/LearnToCreateAVampireSurvivorsStyleGameinUnityC.webp)
![[udemy] 在 Godot 4 中创建完整的 2D 幸存者风格游戏-软件开发学习笔记](https://gamedevfan.cn/wp-content/uploads/2025/05/CreateaComplete2DSurvivorsStyleGameinGodot4.webp)
![[gamedev tv] RPG核心战斗力的创造者 :学习中级 Unity C# 编码-软件开发学习笔记](https://gamedevfan.cn/wp-content/uploads/2025/04/RPGCoreCombatCreatorLearnIntermediateUnityCCoding.png)
![[gamedev tv]Unity 2.5D 回合制角色扮演游戏-软件开发学习笔记](https://gamedevfan.cn/wp-content/uploads/2025/05/Unity2.5DTurn-BasedRPG.webp)


暂无评论内容