目录索引

译文
一般来说队列标签不会以一行代码的形式出现在着色器中,因为它是默认在 GPU 中编译的,与每个材质的对象处理顺序直接相关。
Tags { "Queue"="Geometry" }这个标签与相机和GPU密切相关。
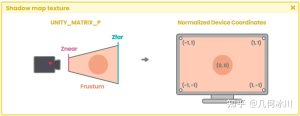
当我们在场景中放置模型时,模型的信息(诸如顶点坐标、法线、颜色等)会被传入到 GPU 中。在游戏视图中的情况也是一样,只不过我们发送给 GPU 的信息对应的是那些位于相机视锥体内的模型。信息传入 GPU 后,这些数据会被发送到影像随机接达记忆器(VRAM),接着我们让它把图像绘制到计算机屏幕上。
绘制模型的过程被称为“绘制调用(draw call)”。一个着色器有越多 pass,就会在渲染时产生越多绘制调用。一个 pass 与一个绘制调用是等价的,因此,如果我们的着色器有两个 pass,那么这个材质发送两次绘制调用给GPU。
现在问题来了:GPU是怎么把这些东西绘制到屏幕上的?长话短说,GPU会先绘制离相机最远的物体,最后再绘制离相机最近的物体(画家算法),绘制的顺序是根据模型与相机 Z 轴坐标之间的距离决定的。
![图片[1]-《Unity着色器圣经》3.1.5 | 队列标签-软件开发学习笔记](https://gamedevfan.cn/wp-content/uploads/2025/05/image-27-1024x323.jpeg)
Unity中,用来处理绘制顺序的队列被成为“渲染队列(Render Queue)”。渲染队列允许我们修改模型在GPU中的处理顺序,有两种修改方式:
- 在材质检查器的属性中修改
- 使用“队列(Queue)”标签
如果我们在着色器中修改队列的值,那么材质默认的渲染队列的值也会被修改。
队列是一个 0 ~ 5000 的范围,其中 0 代表距离相机最远的物体,5000 代表距离相机最近的物体。队列有一些预设好的值,它们是:
- Background.
- Geometry.
- AlphaTest.
- Transparent.
- Overlay.
Tags { “Queue”=”Background” } 代表 0 ~ 1499 的范围,默认值为 1000。
Tags { “Queue”=”Geometry” } 代表 1500 ~ 2399 的范围,默认值为 2000。
Tags { “Queue”=”AlphaTest” } 代表 2400 ~ 2699 的范围,默认值为 2450。
Tags { “Queue”=”Transparent” } 代表 2700 ~ 3599 的范围,默认值为 3000。
Tags { “Queue”=”Overlay” } 代表 3600 ~ 5000 的范围,默认值为 4000。
Background (背景)通常用在距离相机非常远的元素上,例如天空盒。
Geometry (几何)是队列的默认值,用于渲染场景中的不透明物体(绝大多数模型都是)。
AlphaTest (透明度测试)用在必须位于不透明物体前、透明物体后的半透明物体上(例如玻璃、植被等)。
Transparent (透明)用在必须位于其他物体前面的透明物体上。
最后,Overlay (叠加)代表那些位于最前面的元素,比如 UI 元素。
Shader "InspectorPath/shaderName"
{
    Properties { … }
    SubShader
    {
        Tags { "Queue"="Geometry" }
    }
}
High Definition RP uses the Render Queue in a different way than Built-in RP since the materials do not directly show this property in the Inspector, this instead introduces two control methods which are:
高清渲染管线(HDRP)中,使用渲染队列的方式与内置渲染管线(Built-in RP)有所不同,材质并不会直接在检查器中直接暴露渲染队列,而是用两种优先顺序取代了它(参照官方文档:渲染器和材质优先级 | High Definition RP | 10.4.0):
- 材质优先级
- 渲染器优先级
高清渲染管线用这两种顺序来控制模型处理。
原文对照
By default, this Tag does not appear graphically as a line of code. This is because it is compiled by default in the GPU, as it is directly related to the object processing order for each material.
Tags { "Queue"="Geometry" }This Tag has a close relationship between the camera and the GPU.
Every time we position an object in our scene, we pass its information to the GPU (e.g. position of vertices, normals, color, etc.). In the Game View case, it is the same, with the difference that the information that we send to the GPU corresponds to the object that is inside the frustum of the camera. Once the information is inside the GPU, we send this data to the VRAM, and we ask it to draw the object on our screen.
The process of drawing an object is called a “draw call“. The more passes a shader has, the more draw calls there will be in the rendering. A pass is equivalent to a draw call, therefore, if we have a shader with two passes inside it, then that material will only generate two draw calls on the GPU.
Now, how does the GPU draw these elements on the screen? In short, the GPU will first draw the objects found farthest from the camera and the elements closest to it will be drawn at the end. This calculation will be made concerning the distance between the object and the camera, following its “Z” axis.
Unity has a processing queue called “Render Queue” which allows us to modify the processing order of objects on the GPU. There are two ways to modify the Render Queue:
- Through the properties of the material in the inspector.
- Or using the Tag “Queue“.
If we modify the Queue value in the shader, the default value of the Render Queue in the material will also be modified.
This property has order values ranging from 0 to 5000, where “0” corresponds to the farthest element and “5000” to the element closest to the camera. These order values have predefined groups, which are:
- Background.
- Geometry.
- AlphaTest.
- Transparent.
- Overlay.
Tags { “Queue”=”Background” } goes from 0 to 1499, default value 1000.
Tags { “Queue”=”Geometry” } goes from 1500 to 2399, default value 2000.
Tags { “Queue”=”AlphaTest” } goes from 2400 to 2699, default value 2450.
Tags { “Queue”=”Transparent” } goes from 2700 to 3599, default value 3000.
Tags { “Queue”=”Overlay” } goes from 3600 to 5000, default value 4000.
Background is used mainly for elements that are very far from the camera (e.g. skybox).
Geometry is the default value in the Queue and is used for opaque objects in the scene (e.g. primitives and objects in general).
AlphaTest is used on semi-transparent objects that must be in front of an opaque object, but behind a transparent object (e.g. glass, grass or vegetation).
Transparent is used for transparent elements that must be in front of others.
Finally, Overlay corresponds to those elements that are foremost in the scene (e.g. UI images).
Shader "InspectorPath/shaderName"
{
    Properties { … }
    SubShader
    {
        Tags { "Queue"="Geometry" }
    }
}
High Definition RP uses the Render Queue in a different way than Built-in RP since the materials do not directly show this property in the Inspector, this instead introduces two control methods which are:
- Material order.
- And render order.
Together, HDRP uses these two order methods for the control of object processing.
![[udemy]在 Unity 中创建 RPG 游戏的终极指南-软件开发学习笔记](https://gamedevfan.cn/wp-content/uploads/2025/04/TheUltimateGuidetoCreatinganRPGGameinUnity.webp)
![[udemy]学习在 Unity 和 C# 中创建吸血鬼幸存者风格的游戏-软件开发学习笔记](https://gamedevfan.cn/wp-content/uploads/2025/04/LearnToCreateAVampireSurvivorsStyleGameinUnityC.webp)
![[udemy] 在 Godot 4 中创建完整的 2D 幸存者风格游戏-软件开发学习笔记](https://gamedevfan.cn/wp-content/uploads/2025/05/CreateaComplete2DSurvivorsStyleGameinGodot4.webp)
![[gamedev tv] RPG核心战斗力的创造者 :学习中级 Unity C# 编码-软件开发学习笔记](https://gamedevfan.cn/wp-content/uploads/2025/04/RPGCoreCombatCreatorLearnIntermediateUnityCCoding.png)
![[gamedev tv] 完成 Godot 3D:使用 Godot 4 开发您自己的 3D 游戏-软件开发学习笔记](https://gamedevfan.cn/wp-content/uploads/2025/05/CompleteGodot3DDevelopYourOwn3DGamesUsingGodot4.webp)


暂无评论内容