目录索引
译文
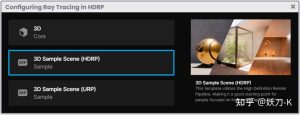
我们将从在我们的项目中创建一个新场景开始。在这个例子中,我们将使用项目中包含的一个默认模板,名为“Basic Outdoors (HDRP)”,其特征是默认情况下具有以下对象:
- 照相机(主照相机)。
- 平行光(太阳)。
- 天空(天空和雾体积)。
值得注意的是,我们将用一个房间和一个球体来举例说明。这些“.fbx”对象可以在本书的相应章节中找到。
我们将在项目中创建两种材质,每个元素一种。我们将房间的材质称为“mat_room”,而球体的材质将命名为“mat_sphere”。我们将确保将HDRP/Lit着色器同时指定给这两个材质。
在开始之前,我们将把每个材质指定给其各自的对象。
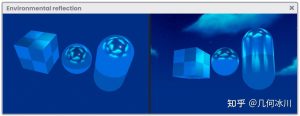
之前,我们启用了“渲染管道资源”中的“屏幕空间反射”属性;因此,如果我们增加任何材料中“金属和平滑度”特性的值,我们将能够实时可视化反射,如图12.0.2a所示。然而,这种反射取决于相机的视角,从而生成图形伪影。
![图片[1]-《Unity着色器圣经》12.0.2 | Using Ray Tracing in our scene.-软件开发学习笔记](https://gamedevfan.cn/wp-content/uploads/2025/05/v2-b9c7786598c9a67479750fe80528acc4_r-1024x431.jpg)
如果要通过光线跟踪激活反射,则必须执行以下步骤:
- 选择“Sky and Fog Volume”对象。
- 转到其“Volume”组件。
- 单击“ Add Override”按钮。
- 选择菜单“Lighting/Screen Space Reflection”。
我们将激活所有“Override”特性。然而,一旦我们启用“Ray Tracing (Preview)”,我们将看到显著的显示效果变化,因为反射将实时计算。
![图片[2]-《Unity着色器圣经》12.0.2 | Using Ray Tracing in our scene.-软件开发学习笔记](https://gamedevfan.cn/wp-content/uploads/2025/05/v2-39eba9aab3adb364aa219ded2739a402_1440w-1024x432.jpg)
通过修改“Bounce Count”参数的值,我们可以增加或减少反射光线的反弹量。
我们可以使用类似的方法来配置环境遮挡和全局照明。为此,我们再次按下“Add Override”按钮,然后选择“ Lighting / Screen Space Global Illumination”或“ Ambient Occlusion”菜单。
阴影的处理过程类似。要执行此操作,我们必须转到场景中的全局灯光(太阳),选择“阴影”菜单,然后启用“屏幕空间阴影”。
我们必须确保激活属性“Ray Traced Shadows (Preview)”才能使其生效。完成此过程后,我们可以转到“Shape”菜单,并根据项目的需要修改“angular diameter”。
原文对照
We will start by creating a new scene in our project. For the exercise, we will use a template included in our project, called “Basic Outdoors (HDRP),” which is characterized by having the following objects by default:
- A camera (Main Camera).
- A directional light (Sun).
- A sky (Sky and Fog Volume).
Noteworthy that we will use a room and a sphere to exemplify the exercise. Such “.fbx” objects can be found in the package attached to this book in their respective section.
We will create two materials in our project, one for each element. We will call the material for the room “mat_room,” while the material for the sphere we will name “mat_sphere.” We will make sure to assign the HDRP/Lit shader to both.
Before we begin, we will assign each material to its respective object.
Previously, we enabled the Screen Space Reflection property from the Render Pipeline Asset; therefore, if we increase the value of the “Metallic and Smoothness” properties in any of the materials, we will be able to visualize reflections in real-time, as shown in figure 12.0.2a. However, such reflection depends on the camera’s angle of view, generating graphic artifacts.
![图片[1]-《Unity着色器圣经》12.0.2 | Using Ray Tracing in our scene.-软件开发学习笔记](https://gamedevfan.cn/wp-content/uploads/2025/05/v2-b9c7786598c9a67479750fe80528acc4_r-1024x431.jpg)
If we want to activate reflections through Ray Tracing, we must perform the following steps:
- Select the Sky and Fog Volume object.
- Go to its Volume component.
- Click on the Add Override button.
- Select the menu Lighting / Screen Space Reflection.
For the exercise, we will activate all the “Override” properties. However, we will appreciate significant graphical changes once we enable “Ray Tracing (Preview)” because the reflections will be calculated in real-time.
![图片[2]-《Unity着色器圣经》12.0.2 | Using Ray Tracing in our scene.-软件开发学习笔记](https://gamedevfan.cn/wp-content/uploads/2025/05/v2-39eba9aab3adb364aa219ded2739a402_1440w-1024x432.jpg)
By modifying the value of the “Bounce Count” parameter, we can increase or decrease the amount of bounce for the reflected rays.
We can use the same analogy to configure the ambient occlusion and global illumination. To do this, we press the “Add Override” button again and select the Lighting / Screen Space Global Illumination or Ambient Occlusion menu.
The process is similar in the case of shadows. To do this, we must go to the global light in our scene (Sun), select the Shadows menu, and enable Screen Space Shadows.
We must make sure to activate the property “Ray Traced Shadows (Preview)” for it to take effect. Once this process is done, we can go to the Shape menu and modify the angular diameter according to the needs of our project.

![[udemy]在 Unity 中创建 RPG 游戏的终极指南-软件开发学习笔记](https://gamedevfan.cn/wp-content/uploads/2025/04/TheUltimateGuidetoCreatinganRPGGameinUnity.webp)
![[udemy]学习在 Unity 和 C# 中创建吸血鬼幸存者风格的游戏-软件开发学习笔记](https://gamedevfan.cn/wp-content/uploads/2025/04/LearnToCreateAVampireSurvivorsStyleGameinUnityC.webp)
![[udemy] 在 Godot 4 中创建完整的 2D 幸存者风格游戏-软件开发学习笔记](https://gamedevfan.cn/wp-content/uploads/2025/05/CreateaComplete2DSurvivorsStyleGameinGodot4.webp)
![[gamedev tv] RPG核心战斗力的创造者 :学习中级 Unity C# 编码-软件开发学习笔记](https://gamedevfan.cn/wp-content/uploads/2025/04/RPGCoreCombatCreatorLearnIntermediateUnityCCoding.png)
![[gamedev tv] 完成 Godot 3D:使用 Godot 4 开发您自己的 3D 游戏-软件开发学习笔记](https://gamedevfan.cn/wp-content/uploads/2025/05/CompleteGodot3DDevelopYourOwn3DGamesUsingGodot4.webp)


暂无评论内容